Tips and Tricks
Shortcut Commands entered in the Callsign Input Field (labelled “Their Call”)
See also Operation Notes and Rove Operations for other entry field commands.
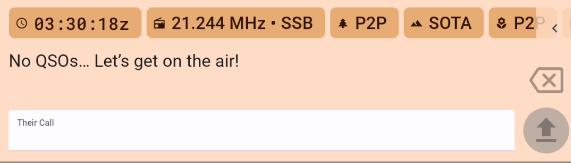
When you are in the callsign input field, you can use the following shortcuts, always followed by the [Send] key or button on the screen:
Enter a band or mode to change the current band or mode. For example
20morCW.Enter a frequency to change the current frequency (and band). For example
14.070or14070.Enter a power level to change the current power level. For example
5Wor100W.Enter a new decimal frequency to change just part of the current frequency. For example, if you are on
14.245and you type.247, the frequency will change to14.247.Enter a time or date to change the QSO time. For example
14:30or14:30:25for time, or05-09for May 9th.Enter a time difference to change the QSO time. For example, if you are logging a QSO at
14:30and you type+15m, the time will change to14:45. If you type-1h, the time will change to13:30. You can usehfor hours,mfor minutes, andsfor seconds, as well asdfor days andwfor weeks. See also “Back to Now” in Post Logging below.Enter
QRV,QSY, orQRTto self-spot with the respective comment. EnterSPOTMEorSPMEto self-spot with current frequency and mode but no comments.Change operators with
OPER/orOP/followed by the new operator’s callsign.Enter
KONAMIto enable or disable Developer Mode.
Smart Data Entry
See the Call Stacking section for handling pile-ups.
In most activation reference fields (POTA, SOTA, etc) you only need to enter letters and number, and PoLo will automatically fill in any dashes and slashes. And in many cases you can skip the prefix too and PoLo will guess it from the callsign.
So for a POTA Park-to-Park contact with, say, LB4FH in NO-2518, you can just enter 2518 and PoLo will fill in the rest.
For SOTA reference VK1/AC-001, all you need is to enter VK1AC001.
Quick field selection
Use the [space] key to quickly select the next field in the form. This is especially useful when you are logging a lot of contacts and want to keep your hands on the keyboard.
Also, if the report is just 59, you can leave the field empty.
Some keyboards also support using the [tab] key to move to the next field, but this can be less reliable. We’re working on
expanding this to more keyboards, but iOS and Android make it harder to deal with these keys than desktop operating systems.
Multiple QSOs at once
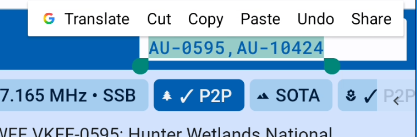
You can use commas to enter more than one callsign at a time and PoLo will log them as separate QSOs. This is useful, for example, when you log a POTA Park-to-park contact with multiple operators on the other end.
This also works when editing existing QSOs if you want to duplicate the information for another operator.
Smart Slash
Most phone and tablet keyboards make it hard to enter a slash (/) character, which is often needed when logging callsigns like WV3H/VE or VK1AO/P. A period (.) can be used instead and PoLo will convert it to a slash.
Bearing and distance
Entering your qrz.com credentials in Settings > Accounts > QRZ will enable PoLo to provide details of contacts you make. If you have a qrz.com subscription it will also provide bearing and distance information to your contact.
Post Logging
Entering logs into PoLo from paper logs may be assisted by these quick entry commands. Using the callsign entry field:
- Type
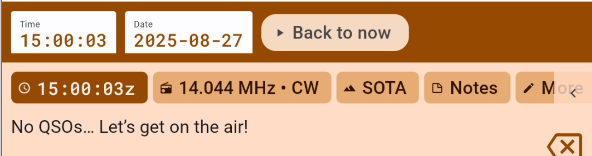
14:55to change the time. This also pauses the clock until you tap on the time and tap “Back to now” - Type
-1mor+3mto adjust the time back one or forward 3 minutes. - Type
-1dor+3dto adjust the days back one or forward 3 days. - Type
7200or7.200to set the frequency. - Type
20mto set the band - where no exact frequency is desired. - Type
CWorSSBto set the mode.
Consecutive entries will advance the QSO time by 1 minute per entry, you may wish to adjust back or forward when you move more than a few minutes away from your written log entries.
When you have finished logging your entries, you can return the timer back to the current time by tapping the time and then the “Back to Now” button
Frequency and Reference editing
Editing/correcting a frequency after a callsign has been entered can be achieved by tapping into the frequency box, backspacing out the entered frequency and re-entering the correct/desired frequency. Let’s not forget that a quicker way to correct a frequency, avoiding multiple taps on the backspace, can be achieved by a tap and hold on the frequency.
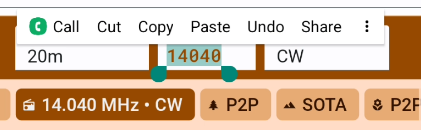
Once the field value is seleced, typing a new frequency will wipe the old and replace with a new value. The same can be achieved in other fields such as the reference fields.
The tap and hold action can also be achieved by 3 quick taps to select the entire field value.